

Using FFMPEG command line interface to easily trim unwanted parts from a video
When recording a video, there is almost always some unwanted footage left in the final file. The camera may start recording before the actual event begins, continue recording after it has ended, or you may simply want to keep only the first few minutes of a much longer clip. For tasks like these, there is no need to install a professional video editor. It is much easier to use the “Swiss Army knife” of video processing: the free FFmpeg utility.
If you simply need to trim unwanted footage from the beginning or the end of a video, FFmpeg can do the job in just a few seconds without opening a heavyweight video editor.
What is FFmpeg?
The tiny, free FFmpeg utility has long become the industry standard for video processing. The project has existed for more than twenty years and continues to be developed by a community of programmers from around the world. It is used by software developers, video editors, system administrators, and even major online services. FFmpeg runs from the command line and does not provide the convenient graphical interface of a traditional video editor, which may seem intimidating at first. However, its extensive capabilities, exceptional speed, versatility, and completely free availability make it an extraordinarily useful tool.
With FFmpeg you can:
- trim videos;
- merge multiple video clips;
- convert files between formats;
- compress videos;
- extract audio;
- create GIF animations;
- change video resolution;
- add subtitles;
- record your screen;
- perform hundreds of other operations.
Step 1. Download FFmpeg
Open your web browser and visit the official FFmpeg website:
https://www.ffmpeg.org/
Download the archive containing the program. For Windows, it is most convenient to use one of the precompiled builds.
Extract the downloaded archive into a folder with a short, simple path. For example:
C:\ffmpeg
Extracting an archive in Windows is straightforward. Right-click the downloaded file, choose Extract All…, specify the folder where you want the files extracted, and complete the extraction.
After extracting the archive, open the destination folder. It will contain several directories. The one you need is called bin. Inside it you will find the file:
ffmpeg.exe
This is the main executable that performs all FFmpeg operations.
Step 2. Prepare the video
Locate the video file you want to trim. For example:
holiday.mp4
For simplicity, copy the video into the same folder where ffmpeg.exe is located.
This eliminates the need to type long file paths.
The folder content should now look like this:
bin
│
├── ffmpeg.exe
├── holiday.mp4
Step 3. Open the command prompt
Many beginners are intimidated by the Command Prompt, although in reality it is simply a text window used to launch programs.
Open the bin folder.
Click the address bar in Windows File Explorer.
Type:
cmd
Then press Enter.
Windows will automatically open a Command Prompt window in that folder, so you won’t need to navigate through directories manually.
How to trim the end of a video
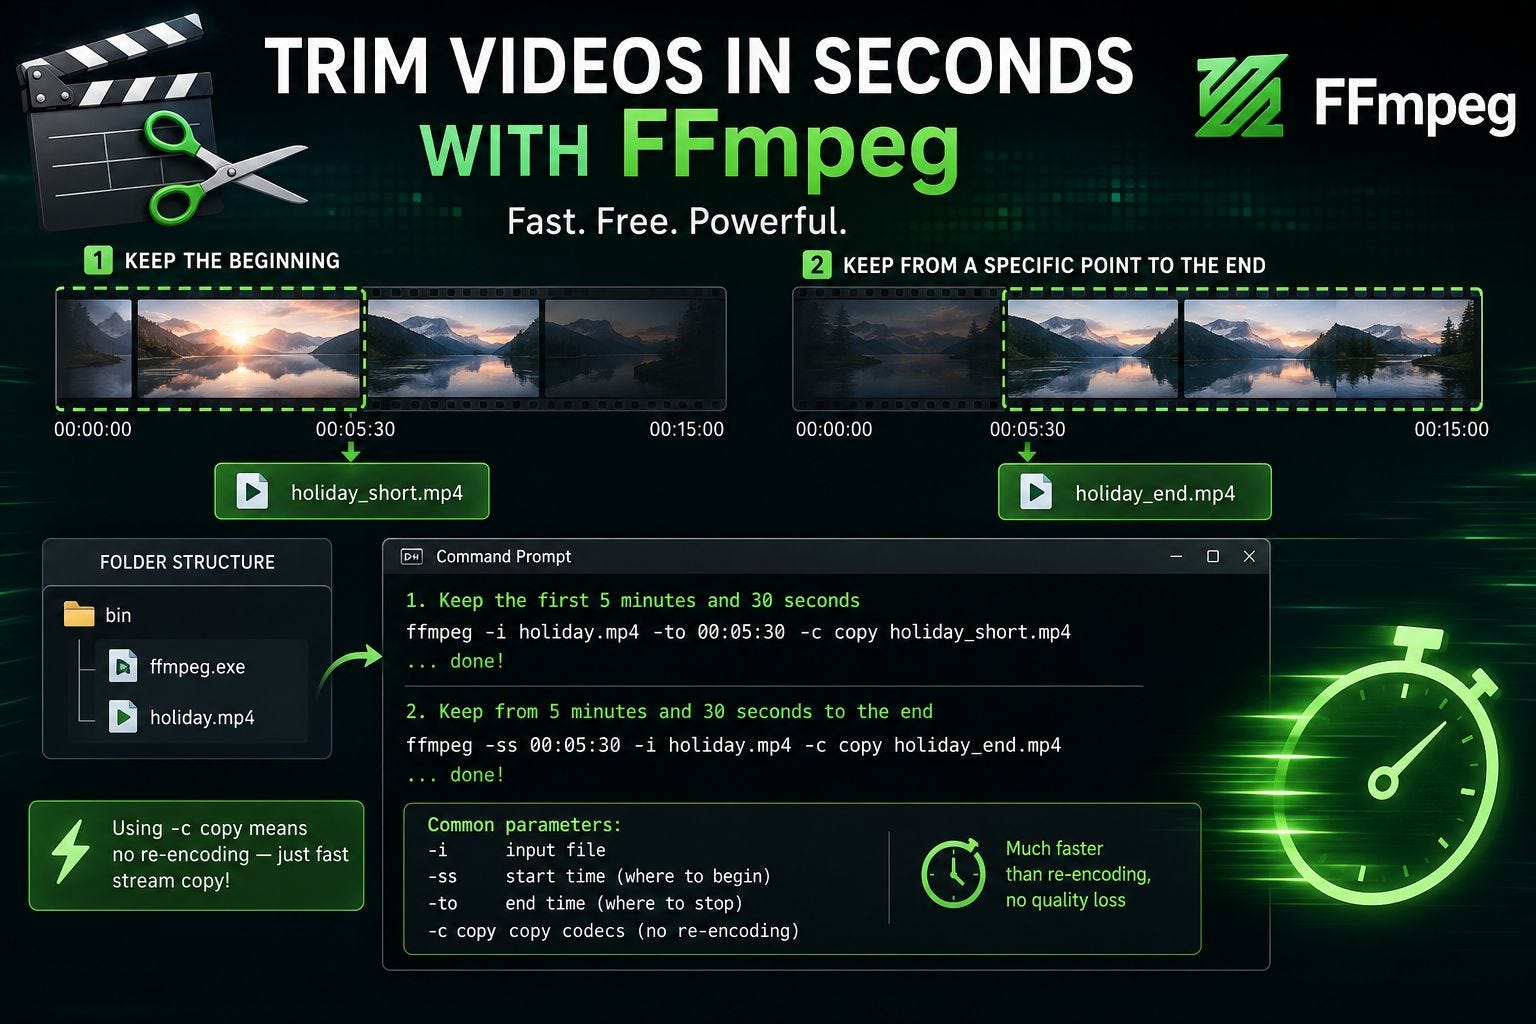
Suppose you want to keep only the first 5 minutes and 30 seconds of a video.
Enter the following command:
ffmpeg -i holiday.mp4 -to 00:05:30 -c copy holiday_short.mp4
Press Enter.
After a few seconds, a new file will appear in the folder:
holiday_short.mp4
The original video file remains completely unchanged.
What each part of the command means
Let’s examine the command piece by piece.
ffmpeg
Starts the FFmpeg program.
-i holiday.mp4
Tells FFmpeg which file to open.
-to 00:05:30
Specifies the point at which the new video should end. In this example, that point is 5 minutes and 30 seconds.
-c copy
This is the most important parameter. It instructs FFmpeg not to re-encode the video. Instead, the program simply copies the existing video and audio streams into a new file.
That is why the operation completes extremely quickly and does not reduce image quality.
holiday_short.mp4
This is the name of the new file that will be created.
How to trim the beginning of video
Sometimes you do not want to keep the beginning of a video. Instead, you may want to discard the first part of the recording. For example, the camera may have started recording too early, while the event you actually want begins only at the five-minute mark. In that case, you simply specify the point where the new video should begin.
For this purpose, FFmpeg uses the -ss parameter.
If you want to keep the video starting from 5 minutes and 30 seconds until the end, run the following command:
ffmpeg -ss 00:05:30 -i holiday.mp4 -c copy holiday_end.mp4
When the command finishes, a new file will appear in the folder:
holiday_end.mp4
It will contain only the portion of the video beginning at 00:05:30 and continuing to the end of the original recording.
How to specify a timestamp
Time values are written in the following format:
hours:minutes:seconds
For example:
00:00:45
45 seconds from the beginning of the video.
00:12:10
12 minutes and 10 seconds from the beginning of the video.
01:25:40
1 hour, 25 minutes, and 40 seconds from the beginning of the video.
Why FFmpeg trims videos so quickly
Most video editors re-encode the entire video after any edit, even something as simple as trimming. This process, known as re-encoding, is computationally intensive, and even powerful computers can take a considerable amount of time to complete it.
In the FFmpeg examples above, the command uses the following option:
-c copy
When this option is used, FFmpeg does not re-encode the video. Instead, it simply copies the required portions of the existing video and audio streams into a new file. As a result, the operation is often limited only by the read and write speed of your storage device rather than by your processor’s performance.
What to do if the trim misses the frame mark you need
Occasionally, the resulting video may begin or end a few frames earlier than the exact timestamp you specified. This is not a bug in FFmpeg.
The reason lies in the way most modern video files are encoded. A video consists of keyframes and intermediate frames. When the -c copy option is used, FFmpeg does not modify the structure of the video stream. As a result, the cut position may be aligned to the nearest preceding keyframe instead of the exact timestamp you requested.
If you require frame-perfect accuracy, the video must be re-encoded. Although this process takes considerably longer, it allows FFmpeg to create a new video stream with cuts placed at the exact frame you specify.